A faulty automotive air conditioning system can be one of the most difficult issues to diagnose and repair. The first thing you should look for are signs of leaking or an A/C compressor that does not engage. If the air conditioning system requires substantial repairs, you may not have the equipment necessary to conduct those repairs at home. If it is low on refrigerant, however, you can recharge it using a recharge kit which you can purchase it at a local auto parts store.
Step 1: Identifying the Issue of the Air Conditioning System
Use the key to start the van and turn the air conditioning system on high. Feel the air coming out of the van air conditioner and assess how warm, cool, or cold it is. If the air is warm to cool, but not cold as it should be, there may be an issue with air flow.
--Check to see if the cooling fans on your radiator are running. If they are not, there may be an electrical issue.
--You may need to replace the cabin air filter in your vehicle to increase air flow.
②Look to see if the compressor of van air conditioner system is running.
You will need to ensure the van air conditioner compressor is working to determine the correct course of action to make repairs if necessary. Locate the van air conditioner in the engine bay and look to see if the center of the pulley is turning along with the pulley itself.
--There is a clutch that engages when the air conditioner is working. With the clutch engaged, the middle of the pulley will rotate along with the pulley itself.
--If the clutch does not engage, the van air conditioner compressor may be broken and require replacement or it may just need to be filled with refrigerant.
③ Check the wiring leading to the van air conditioner compressor.
Most compressors have a wire leading to the electric clutch. Find the connector in the middle of that wire, and unplug it. Take a length of wire and run it from the compressor's wire to the positive (+) terminal of your battery. If you hear a loud CLACK, the electric clutch is functioning properly. If not, it will need to be replaced.
--Replacing your A/C compressor may require specialized tools.
--Bring your vehicle in for repairs if the compressor or clutch needs to be replaced.
④ Look for leaks in the ac units for a van.
You can purchase leak detection kits to help you identify any leaks in your ac units for a van. These kits provide a dye that will run through the lines and seep out of any leaks or cracks, making them visible to the naked eye.
Connect the leak detection can to the low side service port and spray it into the air conditioning system.
If you spot any leaks, you will need to take the vehicle in for repairs.
If you do not spot any leaks, the problem may simply be low refrigerant.
Step 2: Preparing to Add Refrigerant to Air Conditioning System
①Purchase the correct type of refrigerant for your vehicle.
The easiest way to determine the correct type of refrigerant for your vehicle is to check the year it was made.
②Check a thermometer for the ambient temperature.
In order to read the gauge on the refrigerant, you need to know the current temperature in your environment. Refrigerant occupies a different amount of space within the can and air conditioning system at different temperatures, causing the gauge to read differently at different times.
--Knowing the ambient temperature will allow you to effectively read the gauge on the refrigerant can.
--When refrigerant expands to take up more space, it increases the pressure in the can.
③Locate the low-side service port for the air conditioning.
Your air conditioning system will have two service ports: a low side and a high side port. When recharging your van air conditioner, you will need to locate and identify the low side service port.
--You can find the low side service port by following the lines from the A/C compressor until you find a nozzle near the bottom of the van.
--Refer to your vehicle’s service manual to help you locate the port if you are unable to.
④Use a rag to clean the area around the service port.
Make sure you don’t clog the service port with any grime or debris by wiping off the port, cap and area around it with a rag. Wipe the cap and the line first, then remove the cap and wipe off the port itself.
⑤Attach the charging hose to the low side service port.
Take the hose that comes with the refrigerant refill kit and connect it to the low side service port you identified earlier. Make sure the opposite end of the hose is connected to the nozzle on the can.
--If your can came with a gauge, the hose should be connected to the nozzle on the gauge and then to the can.
--The hose should be long enough to allow you to connect it to the port without placing the can all the way into the engine bay.
⑥Use the ambient air pressure chart on the gauge to determine pressure.
Read the gauge display while taking the ambient temperature into account to determine what level the refrigerant is currently at. Once you begin spraying, you will need to keep an eye on the gauge to determine when the system is full.
Step 3:Refilling the Refrigerant
①Turn the valve until you puncture the seal on the can.
Turn the valve on the top of the refrigerant can clockwise until it pierces the top and begins releasing refrigerant through the hose and into the vehicle's air conditioning system.
②Hold the can upright.
As you allow the refrigerant to pass through into the vehicle’s engine, keep the can upright and shake it occasionally. If you turn the can to the side, the pressure will drop and the can will fail to refill the system.
--Shaking the can occasionally will help maintain pressure as it continues to force refrigerant into the system.
--Do not turn the can or hold it upside down.
③Look for leaks.
Keep your eye out for signs of leaking in the air conditioning system as you refill it. If you spot a leak, it will need to be repaired by a professional mechanic. Make a note of where the leak was to make it easier to find and address.
④Remove the charging hose and store the can somewhere cool.
Once the gauge reads as full, remove the hose from the service port and return the cap. If there is refrigerant left in the can, you can keep it to recharge another vehicle or to service the same vehicle again in the future.
⑤Bring the vehicle in for repairs if necessary.
If you spotted a leak or the air conditioning compressor fails to engage, you will need to bring the vehicle in for repairs. Replacing an A/C compressor may require specialized tools in your application, so it is often beyond the scope of most hobby mechanics.
Now Guchen
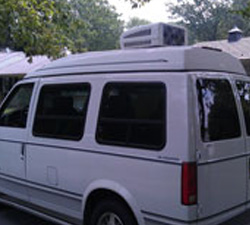
DC-10E Battery ac units for a van,
GC-8C vehicle engine van air conditioner, and
GC-10E air conditioning system are hot sale, so if you are interested in our products and have the intention to buy it, please
contact us immediately and we will offer you the best order exoerience !